OK blogettes, i know i am techno challenged so no video tutorials from me, bu i am hoping that these pictures may help.
First of all let me just tell you that you will find it very difficult to punch out some vellum with a normal craft punch so before i went ahead and showed you how i did mine i tried all different grams of vellum and with these pictures i have used a normal stationary trace paper that i colored with adirondack, i think that the normal trace paper is only around 60gsm. so it is tissue thin.
1) this is what you gonna need: Round nose embossing tool, vellum, A4 printer paper, and i am sure you all looking puzzled at why i have that childrens play roon mat in my picture, well girls i love to use these behind my paper when piercing holes into my paper and it also has the right ammount of give for moulding these petals. The A4 printing paper will be held loosely behind the vellum paper or trace if it is too flimsy to punch as this will help the punch to slice right through both pieces at the same time giving you a nice clean punched flower.
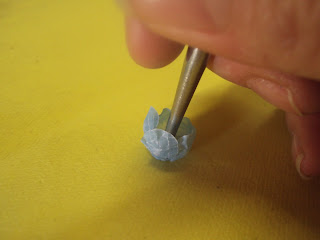
2) Lightly press with your tool onto each petal making it slighty curve, and once you have done each petal, moving in circular movements, mould the centre until all the petals start to fold in towards the centre.
3) Now depending on how well they are curled or not, doesnt really matter since you can flatten it or curl it more as you see fit when glueing them together. However i might just add for you not to start with the samllest centre piece but rather with the flattest piece first and then work your way towards the smallest bud in the centre.
Good luck and i hoe this helps somewhat, for making those filmy vellum flowers, will share my card with you in the morning that i intend to use these flowers on.
If you gonna leave some feedback please be kind, he he


Hi Paola
ReplyDeletethanks for posting this,it's really usefull, I've been able to punch vellum properly, and I don't have a die cutting machine(tut tut), will give it a go Hunny.
Hugs Kaylou xoxo